Sunday, January 31, 2010

Fire and Lights - Parshat Yitro

Between the Fifth and Eighth grades I saw the Pink Floyd Laser show at the Museum of Natural History in NYC not once but twice. Frankly I wasn't so into the music but the show was a lot more mesmerising than the regular planetarium shows explaining the constellations. Actually, each time I saw the laser show I felt a bit bombarded by the stimulus of the 3D lights and figures, the loud music and the smoke machines. The laser shows have been discontinued (replaced by pretty amazing space shows in the renovated planetarium) possibly because other young-uns felt a similar sensory overload. I imagine that this must have been how the Nation of Israel felt at Mount Sinai as God was preparing to give them The Ten Commandments.


In Parshat Yitro God puts on his own sound and light show replete with smoke, fire, more smoke and shofar blasts (not exactly the same but check out this show at Masadah that I have often heard about). God is cuing up the drama, to let everyone know that this is going to be an important moment and that they'd better pay attention to the rules that are about to follow. God, like all museum guards, doesn't want anyone to get too close to the exhibit and tells Moses to make sure everyone stays a safe distance away from the Mountain. However there wasn't much of a need to be concerned - the Nation is actually so freaked out that they tell Moses they don't want to hear God give the commandments directly to them because they're afraid they might die - they would rather their fearless leader be the go-between. So maybe the fire, smoke and noise was a bit much, or maybe it got everyone in the appropriately awestruck mood.

Now to bring the fire and smoke to the Shabbat table (without actually violating the Sabbath). I've conceptualized a home smoked salmon dish (with the help of liquid smoke) with a spicy salsa that's the fire part.


Much like our wedding menu,* this dish brings together my Irish Heritage with Sam's Mexican heritage. You can get amazingly fresh and wild Salmon from Ireland's River Moy, which runs through County Mayo. My family enjoyed a stay along the river in Ballena several years ago and ate meal after meal of melt in your mouth pink salmon. I will make due with wild Alaskan Salmon from the supermarket. The variety of salsas in Mexico caters to every one's tastes - even those with wimpier palates who don't like a lingering burning sensation on their tongue. I've had salsa with cactus, mango, ridiculously hot chilies and can't wait to eat some more on our upcoming honeymoon in that country (yes we're 2.5 years behind, but at least it's happening)!


Smoke and Fire Salmon and Salsa

You can serve this together as an appetizer. To make it a main dish I would serve it with a wild rice and a grilled vegetable or fresh salad on the side.


I really encourage you to buy wild salmon - the taste is so far above and beyond farm raised salmon, and you'll be doing your part for sustainable eating. I always use the Monterey Bay Aquarium's Seafood Watch Guide when buying my fish to make sure I'm making the best choices (I now use their ipod app but used to carry around the printed pocket guide which you can download at the link above).

1.5 lbs of Wild Salmon
1/2 tsp Liquid Smoke (several companies make a kosher version, I picked up one by Colgin)
½ cup maple syrup
2 cloves of garlic
¼ teaspoon sea salt
pepper

1 onion chopped
2-3 tomatoes
1 small green jalapeno
Bunch of fresh cilantro
1 cantaloupe, seeded
2 limes
salt

To prepare the salmon (I got this recipe from the Colgin link above - they have a stunning amount of recipes!) preheat the oven to 425 degrees. You can either cut the fish into fillets for the number of people you wish to serve or keep one large fillet intact and place the fillet(s) skin side down on a silpat in a baking pan. Mix the liquid smoke with the syrup, garlic, salt and pepper and stir. Brush the fish with half of the syrup mixture and bake the fish for 8 minutes, then brush the rest of syrup onto the fish and bake for 8-10 more minutes (go longer if you prefer your fish more well done). The trick to cooking fish is to watch it and test it to see if it flakes when you poke it with a fork- that's how you know when it is done. After you remove the fish from the oven spoon the syrup that has collected in the pan around it back over the top.

To prepare the salsa I'm using Sam's standard recipe, with the addition of some cantaloupe for a fruity twist. Finely chop the tomato, cilantro (you can use all parts of this herb) and onion. Cut the jalapeno in half and remove the stem and seeds. Finely chop the jalapeno. I would advise washing your hands after handling the jalapeno so that you don't risk burning any part of yourself. Mix with the tomato, cilantro and onion and squeeze the juice of the 2 limes over the mixture and add salt to taste. Cut the cantaloupe into small cubes and add to the mixture last.

* Our Wedding Menu (we were married in July of 2007 on the grounds of a historic home along the Hudson River)


Cocktail Hour

Peppered tuna skewers with wasabi mayonnaise
Charred spicy beef en brochette
Petite ceviche martinis
Individual crudite with fresh guacamole (using Sam's recipe)
Tiny Rueben sandwiches
Classic cod fritters with a horseradish remoulade sauce
Miniature spoons with tiny meatballs and sauted cabbage
Petite Irish potato pie
A selection of cured olives

Dinner

Tortilla crisps and fresh mango salsa
Chilled gazpacho soup served aside a chopped salad of roasted corn, black beans, red onions, cucumber and red peppers
Baby field greens and grape tomatoes served with a roasted eggplant and Portobello mushroom with citrus vinaigrette served on the side in a petite crystal sauce pourer

Grilled fillet of citrus marinated salmon with a lime sauce, served with rosemary roasted Irish potatoes and a medley of summer squashes
Or
Grilled breast of chicken in a barbecue chimichurri sauce, served with green and red cabbage slaw with a horseradish dressing and dilled potato salad

Dessert

Martini glass filled with fresh fruit and topped with passion fruit sorbet, a drizzle of raspberry sauce and a sprig of fresh mint
Platters of grilled fruit on each table

Thursday, January 28, 2010

Double Batch - Parshat Bishalach Part II


This week the double portion theme really got to me and I baked two batches of challah! The first I used as a photo opp which produced the pictures on the earlier entry this week and then I shipped off two of the loaves to my brother. A few months back my brother and I had agreed not to send expensive generic Chanukah gifts. Instead, he sent me a wonderful handmade funky print of a photo of Sam and I on a biplane. I thought I'd reciprocate by sending some things from my kitchen, only it has taken a while.

This is actually a resurrected family tradition of sending challah. Every week when I was at Camp Moshavah my dad used to send me challah with our neighbor who commuted between Camp and Riverdale. On weeks when he couldn't get it to me that way he would Fed Ex it. This was obviously challah from the esteemed Bagel City and it made me a very popular girl at camp. So Benjy- I hope you're the most popular boy in Ocala. Or you can have it all to yourself for Shabbat.

The second batch I made for a demo at a CJP Oneg on Friday morning. I had proposed the crazy idea that at 9 am I would do a short text study on the story of the manna in the Parsha, make the connection to challah and do a challah braiding demo and then a tasting of a pre-baked challah - all in 15 minutes. Thankfully it went off without a hitch. And the most important lesson I taught I learned from Laurie Colwin's Home Cooking (a real gem from the 80s - thanks for lending it to me Shif!) - don't let bread dictate your schedule - you should dictate it's schedule! Which I did, twice this week.

A few more quick updates:
1. Sam and I sampled two of the sausages from Smokey Joes for dinner on Thursday night that we browned and served with polenta and sauteed onion and zuchini - my God were they good! I wish you could have been with me as I was browning them for the Tagine - wow I had to hold myself back from eating them all right then and there.


2. Happy (almost) Tu Bishvat. Here are some great links to Tu Bishvat resources such as a podcast for how to run a Tu Bishvat Seder, some environmental ideas and good down to earth lessons from Rav Alex Israel.

3. I snuck a square of one of the date bars and boy were they delicious

Sunday, January 24, 2010

Namesake - Parshat Bishalach


Ok, I'm pretty excited about this week. The portion contains the reference to the whole reason behind the name I chose for this blog!

Here's how that worked. In this week's portion, Parshat Bishalach, the Israelites make it through the split sea, narrowly escaping the Egyptians who end up coming after their slaves. Lots of rejoicing, praising God and merriment ensues. Then it's back to the harsh reality that there is a long, dry, dusty desert road ahead of them, and they are totally dependent on God for ... everything.

But God has their back - creating a cloud to shade them during their day time travel, and a pillar of fire as their night light. And then, low and behold, manna, or man, rains down from heaven each morning for their gastronomical pleasure. Many commentators say that manna tasted like whatever the eater imagined. The text says "it was like coriander seed, white and tasted like wafers in honey," hence the pictures above and below of wheat berries, my stand in for coriander seeds. And what's more, at the end of the week, in preparation for Shabbat, a double portion of manna falls on Friday (no man collecting on the Sabbath, the day of rest, though the Israelites have a hard time catching onto this at first, see Exodus, chapter 16).


So you see? One of the reasons behind the name of my (still feels like new to me) blog is from this special, weekly double portion of manna. My genetically programmed corny sense of humor is probably what propelled me to choose the title. Because not only is the blog name a reference to this double portion, it also references taking seconds of yummy food (which I hope I am providing you good directions for), and the weeks when two Torah portions are read on the same Sabbath (here's why).

So now to the recipe. It is commonly understood that the reason we have two loaves of challah at our Shabbat meals each week is to represent this double portion of manna that the Israelites received for all 40 years in the desert. And I do think it is high time I shared my challah recipe with you. Not to brag, but it's unbelievable!! And I'm not the only one who thinks so. Making challah almost every week has become my routine, and it only strikes me as extraordinary when I watch my guests stay quiet for longer than they have to after eating the bread, and then asking wide eyed "did you make this"? Aw shucks.


For those who might not make challah yourselves because you are intimidated by it - just stop that right now. Challah is not intimidating. There are steps that can trip you up if your not prepared- particularly the kind of yeast you use (see my note below) but that's ok - my first try at challah 10 years ago, when I lived in Israel, produced a rock hard bread that my hosts couldn't slice through with a sharp bread knife.


Please know that I don't use a bread machine (most frequently asked question) and with the rare exception of weekends that I have made this in someone else's kitchen and for some reason or another produced challahs that, according to my father, looked like Mickey Mouse shoes (they still tasted great) things go pretty smoothly. And, I think my husband falls a little more in love with me every time he bites into a warm hunk of my home made challah.

I dedicate this post to my Abba (father). It was with him whom I baked my very first challahs when it was just me and my 2 hippy parents living in the middle of the woods. There, my dad and I would defrost the Kineret Challah you can find in the freezer section of many grocery stores, shellac them with egg and sprinkle with poppy or sesame seeds. Once we moved to civilization (aka Riverdale) and kosher bakeries with freshly baked loaves abounded, the search for the holy grail of challah began. A few years in my father got kicked out of Heisler's Bakery in Riverdale for demanding better service and we were off on our search again. By the time I was in high school every Friday morning we were driving the carpool out to Washington Heights on the way to school in Teaneck to pick up yellow, cake-like-challah from Bagel City for our family and at least 3 others in Riverdale. Not only were we in love with the challah, we loved Moshe, the colorful Israeli owner who would start baking challah, bagels, and my favorite- apricot danishes, at a very early morning hour.

Then tragedy struck when Bagel City closed up shop. We were all bereft and my Abba started trying every cakey looking challah he could get his hands on. Each week he dropped my brother off at his bass guitar lesson in Williamsburg, Brooklyn and would poke around the neighborhood for an hour trying to dig up an amazing challah. We tried a lot of interesting stuff in that time, but no true replacement. Consolation came when we heard Bagel City challah would be available commercially - but obviously it never tasted as good. My dad never did find the perfect replacement, but now has a whole new slew of bakeries to try in Boynton Beach. And if he ever needs challahs in the shape of Mickey shoes, he knows I'm his girl.

Challah

This is a recipe that I originally got from Sara Shemtov, the Chabad Rebbitzin or Riverdale. I have since halved it and played with it. For a long time I was making it with half olive, half canola oil, but recently switched back to all canola and I'm sticking to that. I also like to use honey instead of sugar some weeks.


A note about yeast, kneading and rising: first of all, I suggest buying a jar of yeast if you think you may get into the habit of challah baking. When I first started making challah I had some trouble getting the dough to rise well - I was somehow convinced that this was all the fault of Fleishman's yeast and swore that off for years. But I recently tried it and it works just fine.


The key to getting yeast to rise well is two fold - use very hot water to dissolve it in and add sugar right away to feed it! I used to knead the dough by hand but I have weak wrists and now just let my Kitchenaid do it for me with a dough hook (I mix my dough in there as well). If you're lucky enough to have one I recommend you use it. And lastly, let your dough rise in as warm a place as possible - mine is often near a stove that's on.


2 packets , or 4 and 1/2 tsp of yeast
2 cups of hot tap water
1/2 cup sugar
1 Tbsp salt
7 cups of flour
1 egg, beaten
1/2 cup of canola oil

In the bowl of a mixer or a regular bowl, dissolve yeast in hot water with a fork or a spatula. Then add sugar right away and dissolve. Add salt and dissolve.


Next, add three cups of flour and mix well with the dough hook of a mixer or with a fork. Add the beaten egg and the oil. Slowly stir in the other four cups of flour.


When the dough pulls from the side of the bowl, either let the dough hook go for another minute or so to knead, or take out and knead for 10 minutes by hand (think of kneading as folding the dough over on itself and squishing it down, again and again).


Place the dough in an oiled bowl and turn the dough over in the bowl to coat with oil. Cover the bowl with a warm damp cloth. Let the dough rise in warm place for 2 hours (or a bit longer or shorter depending on your schedule). Also, depending on your schedule try to punch the dough down every so often.

Now it's time to form the loaves. You can make 2 large loaves or 2 medium and a small. Tear the dough into the number and size of pieces that you want. Divide each piece into three and squeeze each into a coil (try not to man handle it too much, I don't roll them). Braid the three coils into loaves. Repeat with remaining pieces and put the loaves onto a silplat mat, parchment paper or a greased sheet.

Re-wet the cloth with warm water and cover for an hour- set in a warm place to rise like on a warm over. Preheat the oven to 375 degrees.

If you like to be fancy you can brush the top of each loaf with egg yolk, but I usually don't. Bake for 20 minutes, until golden brown (but it will still be on the doughy side).

Tu Bishvat Bonus Recipes


I'm planning on featuring the following two fruit-filled dishes at our Shabbat Meal, which falls on Tu Bishvat, the Jewish new year of the trees. Biblically, this holiday (the 15th day of the month of Shevat) was a way to count the years of a new tree- and determine which tithes to take from which trees. Kabbalists later wrote a Seder for the holiday, to appreciate and celebrate the produce that God creates. Today, many environmentalists use it as a day to focus communities on our use of resources. It is still customary to eat fruits on Tu Bishvat, and a custom of eating dried fruits evolved for the non Mediterranean folks (but fresh is cool too).

Lamb Tagine over Couscous

My brother makes this for our family practically every time were together for Shabbat. He used to enjoy eating it at Darna in NYC and found a recipe on food network to recreate it - the only change he makes is omitting the squash. I plan on serving it over some couscous (which you can easily buy in the grocery store and follow the directions on the box to cook it up) I think it's a great Tu Bishvat dish since it uses lots of dried fruit.


I'll be using lamb sausages from Smokey Joe's Kosher BBQ in Teaneck where Sam and I had a delicious, carnivorous meal this week (I dare you to read their menu without salivating) and we had to bring some home (along with some of their wing sauce, but that's for another use).


Date Bars

These will be for desert. My mom would make these from time to time and the recipe that I came across on the blog Seven Spoons reminded me of that so I'm going to give it a whirl.

Early Rising - Parshat Bo II

Friday morning felt a bit like a reenactment of the Exodus story for me. I was up in the middle of the night (actually it was just much earlier in the morning than I ever wake up) because Sam was off to a conference and I thought I'd rise early with him and cook some soup for Shabbat as well as these pitas. While there was no dirt floored hut in Egypt, there was little light outside of my Cambridge kitchen window and there was a kneading bowl full of bread dough. The kneading bowl happened to be attached to my Kicthenaid mixer which I ended up throwing the dough into since I was having a tough time mixing it by hand (I threw in a few extra tablespoons of water to help the dough come together in the mixer).


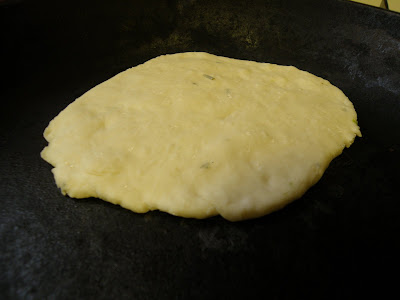
After letting the dough sit for the time it took me to make some lentil soup, I divided it into round pieces and began to roll them into flat (sadly very asymmetrical) pitas. I could really smell the rosemary which I had kneaded in and helped wake me up a bit more than my cup of coffee did. I kept the newly formed but uncooked pitas covered in a damp cloth and fired up my cast iron skillet.


Each pita took about 3.5 minutes and for the ones that I left on a bit longer than that they really got a nice crackle on the outside.


I couldn't help but munch on one as I went along making them - kind of a funny snack at 7 am but it was really a treat to eat it right after it was made, so warm and soft and smelling of dough, garlic and rosemary.


At the end of the batch I was rewarded yet again with a pillowy pile of pita, which I babied by covering with a clean dry cloth.


Later that night, after all of our rushing around, Sam and I heartily enjoyed these along with the lentil soup for a simple Shabbat dinner for two. They were great on their own and were also nice to dip into the soup.

Sorry I didn't have time to report on this before Shabbat. I hope to tell you all about Parshat Bishalach in the next few days. Get excited, there will be some bonus recipes for a certain holiday coming up this week as well.

Monday, January 18, 2010

Bag it Up - Parshat Bo

There are dishes we all like to throw together in a hurry. Some of mine include scrambled eggs and cream cheese when running late for work, chicken with quartered lemons, sprigs of rosemary and peeled cloves of garlic when there is a one hour countdown before Shabbat and a table full of people to feed, and sardines and goat cheese over lettuce with fixins (as my husband calls salad toppings) and some lemon garlic dressing upon returning from work famished and tired. In this week’s portion, Parshat Bo, the whole nation does some hurried and harried cooking when they produce flat breads as they’re rushing out of Egypt.

Picture this. You’re a Hebrew slave in Egypt and you know your buddy Moses has been working on Pharoh to let you and your fellow Hebrews go. You find out that in the middle of the night your buddy Moses gets a distressed called from Pharoh who can’t think of anything else to do about all the Egyptian children dying in the final plague, and tells him, “Get out of from among my nation and go and worship your God as you have been asking for.” All of a sudden your Egyptian neighbors are goading you to leave Egypt hoping it will save them from the plague. You and all your Israelite friends can’t Fred Flintstone your legs fast enough to get out of there before anyone changes their mind.

But you have the thought- what if I get hungry along the way? So you grab that bowl of dough you just kneaded which hasn’t yet had time to rise, and you wrap the bowl in your cloak and carry it over your shoulders on the way out of Egypt. You had no time for any significant tzedah laderech, and it looks like most your friends had the same idea.

You all make it to the outskirts of Egypt. While waiting for the next leg of the Exodus you all bake these unleavened (i.e. un-risen) cakes of dough, aka Matzah. Nowadays your great, great, great, great (etc) grand kids eat that same stuff at their Passover Seders.

The commandment about celebrating Passover, eating Matzah and avoiding any risen bread for the seven days of the holiday to memorialize our freedom appears in this portion right after the whole Matzah making story. Some of you may not be so thrilled with the story’s no bread on Passover conclusion, others may be closet Matzah pizza lovers, or may engage in debates over Matzah shmeared in cream cheese versus Matzah and butter. Personally I can’t get enough Matzah brei (rhymes with eye) over Passover, and I enjoy the first few crunches of shmurah Matzah at the Seder, but I am always jealous of those who have the custom to bake their Matzah in a way that is soft and doughy, probably closer to how the Israelites did it in this weeks Parsha.


If you are ever in Israel for Passover you can find these types of doughy pita breads, or lavash, being sold in the outdoor markets for those who use them at their Seders. While I wish my family did, alas we hail from Eastern Europe and stick only to the crackly stuff. But I can enjoy this type of fluffy home made treat year round, and am especially looking forward to doing so this Shabbat. Note that the recipe I use involves considerable rising time to get those pitas as puffy as possible, which is not how those who eat lavash on Passover make them, nor is it very much in the spirit of the weekly portion. So if you're pinched for time, or feeling in the mood to be truer to the text, go ahead and skip the rising process, the pitas will still be delish.

I have made pita/lavash a number of times at home (both with a rising time and without), and love the smell that pours out of the kitchen when I do. I feel a sense of accomplishment as the warm stack of white flour colored discs with a few delicious charred spots grows higher as the cooking goes on. Sam and I enjoy the pitas with home made shwarma (which we make by chopping leftover turkey and frying it in a pan of oil and middle eastern spices) or spiced ground beef and chumus when we're missing Israeli fast food. You can also incorporate some aromatic spices and herbs into the pitas themselves. I’m going to try adding crushed garlic and rosemary to some of mine this time around. And I might use them in place of Challah at my Shabbat meal. Try the recipe below and if you can reheat them a bit before serving on Shabbat I think they will taste like when you first made them- steaming with the smell of carbs and haste. I’d love to hear how they turn out for you!


The recipe I use came from a tall cookbook by Marlena Spieler titled Jewish Cooking that my Aunt gave me 5 years ago. It’s the kind of cookbook you can find at Borders - with the wonderfully large and colorful food photographs that really entice you to make a dish, and that often illustrate part of the cooking process. It’s the perfect kind of cookbook for me since there isn’t a single recipe in it that doesn’t have a corresponding photo (and as I have previously revealed, I mainly choose the recipes I attempt based on pictures). As a plus it has a nice section at the beginning on Jewish history and Jewish foods.

Pita or Lavash

Adapted from Jewish Cooking by Marlena Spieler

Lavash is simply a longer, pocketless pita. The pitas in this recipe generally come out pocketless. This is best cooked in a cast iron or a grill pan (or over the grill if you happen to have access to one in the winter). Feel free to cut out the rising time.

4.5 cups of flour
1 packet of yeast (rapid rise)
1 tbsp salt
1 tbsp olive oil
1 cup of water
Optional spices such as fresh garlic and rosemary

Combine the flour, yeast and salt in one bowl. In another large bowl, mix together the oil and water, then stir in half the flour mixture. If you want to add spices, such as the garlic and rosemary I suggested, now is the time. Knead in the rest of the flour and shape into a ball. Cover the bowl with a damp dishtowel and leave in a warm place for 30 minutes to 2 hours (depending on your time frame).

After it has risen, knead the dough for ten minutes. If you have time, cover and let it rise again. If not, divide the dough into 12 pieces for nice round pitas, or fewer for larger longer lavash. Dip your hands in to some flour to keep them from sticking to the dough and flatten each piece with a rolling pin or your hands. Try to keep the pita ½ an inch thick. Keep the dough that you aren’t working with covered.

Heat a cast iron skillet over medium high heat. Wait for it to get smoking hot and then add one of the pitas and cook for 20 seconds (cook the lavash for slightly longer). Turn it over with tongs a cook for 1 minute on the other side (again, longer for lavash).

When large bubbles form on the bread turn it over again and watch as it puffs up. Press down gently with a dishtowel, and then cook for 2-3 more minutes. Remove from the pan and wrap the pita in a dry dishtowel. Repeat with the remaining dough, adding the finished pitas to the stack in the dry dishtowel.

Serve hot and moist!

P.S. I made a big batch of granola this weekend with the recipe from a few weeks ago - this time with cashews, craisins and apricots.

Wednesday, January 13, 2010

Hard at Heart - Parshat Va'eira

Moses and his brother Aron are tasked with some negotiating in this week's portion, Parshat Va'era. Together they have to tell Pharoh to let their people go. Their first attempt at this was in last week's portion and it didn't go so well - Pharoh had never heard of "this God of theirs," got pissed off at the prospect of losing his huge, free workforce and therefore made the work of the Hebrew slaves even harder.

Moses and Aron's attempts at negotiations seem doomed from the beginning since in last week's portion God tipped them off to the fact that he would be metaphorically hardening Pharoh's heart around the matter. "He what?" you might ask. That's right, God essentially makes Pharoh his puppet king and causes his heart to become "heavy, strong, hard and stubborn." As a result, Pharoh flip flops between being dead set against letting the people go and giving in - and then right back to ordering them to stay put. Sounds like a complicated thing to orchestrate, but God can handle it.

It does seem kind of mean of God to set Moses and Aron up for failure like that and be such a control freak. But there is a grand plan: the miracles and ten plagues that Moses and Aron set into motion gradually wear down Pharoh's hardened heart. They won't break him completely and in the next portion God will have to come to the rescue and take the Nation of Israel out of Egypt. Not only will the Jews be impressed by this rescue, so will all of Egypt - which is the point of the whole heart-hardening process. So God isn't being mean, just trying to make a point.

We do see Pharoh's heart flip flopping and being worn down and several times through out the plague process in this week's portion. It stinks to have frogs in your bed (plague #2), swarms of wild beasts trampling your city (#5) and fiery hail raining down on you (#7). Pharoh is so uncomfortable in these situations that after each he has a change of heart and tells Moses that he and his people can leave. But once the plague stops, he is back to being hard-hearted and no Hebrews are going no where. Flip Flopper! Spoiler alert: It will take three more plagues, namely the death of the first-borns, in the next portion before he changes his mind again. But then, as the nation is finally heading out of Egypt he changes his mind again and God swoops in to shuttle his people through a split see - wowing them all.

Now at this point in the story with heavy hearts, villains and near death experiences you may not be in the mood for any kind of food. But there is a recipe coming. Two actually.

I wanted to play on the heavy heart idea (since it is such a determining factor in the portion) but not in a gross way. Two dishes seem good and heavy to me are Shepherd's Pie and Tart Tatin, which are not gross at all. These dishes have actually been on my mind lately, and here's why.

Sam and I spent New Year's weekend at a sweet B&B just outside of Portsmouth, NH and we enjoyed some Sunday afternoon Irish jamming at the Dolphin Striker's Tavern in Portsmouth. This middle aged group and the jolly crowd singing along transported me to a family trip to Ireland we took several years ago. I even nursed a hot toddy, the very first thing I had on that trip. Sam enjoyed a Guinness and we enjoyed the music, which we kept wishing wouldn't end. After many encores the band did wrap up and one of the female members came over to our table to say hi. I noticed she had several charms on a gold chain around her neck - one of which was a Celtic knot and another a Jewish star. "Are you part Jewish, part Irish?" I asked. "Yes" she said, to which I quickly responded "me too."


While Pat O'Brian might not sound like a Jewish name, her mom's family moved to Northern Ireland from Eastern Europe and her dad was native to Ireland. My maternal grandmother was born in Ireland and my dad's family is from Eastern Europe. I have always been proud of this mixed heritage of mine (I am known to sport my Urban Outfitter, everyone loves and Irish girl T-shirt). The pub experience and Jewish connection put me in the mood for some Irish eating and drinking and together with this heavy hearted theme I was reminded of a great Shepherd's pie I made several years ago with Guinness!


A shepherd's pie is a heavy dish on its own, all that meat slathered with a blanket of potatoes, but add in some heady Guinness and it gets even heavier. I haven't been able to find the recipe I originally used but below is what I hope will be an acceptable recreation. The dish feels like a good fit this week, given both the portion and the weather in Boston.


The second dish, Tart Tatin is one whose name trips all over my tongue and makes me feel like I'm back in Paris eating one. I have never made the dish myself but saw it being made on a Food Network show last week and loved how beautiful it looked to caramelize the sugar in a cast iron skillet, drop plump white apple slices in and tuck it under the cover of a pastry dough. When this tart is served, the apples look like glistening heavy jewels that have embedded themselves into the bottom (which then becomes the top) of this dish. I also think this will serve nicely after the Shepherd's Pie.


Shepherd's Pie with Guinness

I make this version without any extraneous vegetables.

2 lbs ground meat
1 onion, peeled and chopped
1 clove or garlic
1 bottle of Guinness
5 potatoes, peeled
1/4 cup of soy milk
4 tbsp of butter substitute
2 tbsp olive oil
2 tbsp tomato paste
salt
pepper

Heat the oven to 375 degrees.

Start with the potatoes. Boil them until they are very tender (test by poking with a fork). Drain the potatoes and mash in a bowl with the soy milk, butter substitute and salt and pepper.

Heat olive oil in large frying pan over medium heat. Add the onions and garlic and saute for 5 minutes. Add the ground meat and quickly brown it. Then pour in the bottle of Guinness and lower the flame slightly. Cook until the liquid has almost evaporated (this will take a while). Add tomato paste and stir.

Transfer the meat mixture to the bottom of a baking dish and cover it with the mashed potatoes. Bake for 20 minutes.

Tarte Tatin

This is based on the recipe I saw on the Food Network show. Here is a link to a video from the show.

Crust:
1 stick butter, cut into pea size pieces
1 cup flour, plus extra for rolling
1/4 cup sugar
salt
1 lemon's zest
1 egg yolk
2 to 3 tablespoons ice water

Filling:
1 cup sugar
1/4 cup apple cider or water
1/2 lemon, juiced
1 stick butter, cut into pats
6 apples, such as Golden Delicious, Granny Smith, peeled, cored and quartered

Preheat the oven to 425 degrees.

To make the crust combine the butter, flour, sugar, salt and lemon zest in a food processor. Pulse until it looks like Parmesan cheese. Add the egg yolk and 1 to 2 tablespoons of the water. Pulse until the mixture comes together in a ball (add more water a bit at a time if it seems dry).

Transfer the ball onto a cookie sheet with a non-stick mat on it. Press the dough with your fingers out to an even circle that is an inch or two wider than the skillet you will bake the tart in. Cover with plastic wrap and refrigerate for an hour.

Start on the filling while the dough chills. Place the sugar, apple cider or water, and lemon juice in a 10-inch nonstick ovenproof pan - a cast iron skillet close to that size is best. Stir to combine. Over high heat bring the mixture to a boil. After 6 minutes the mixture will turn light brown. There is a fine line between perfecting and burning sugar so don't let this go a minute too long!

Remove from the heat and stir in the butter, 2 pats at a time. The mixture will bubble up - be careful not to burn yourself with the liquid. When all of the butter has been incorporated, neatly arrange the apples rounded side down in circles (make it pretty - the bottom will be the top).

Take the chilled pastry from the refrigerator and place it on top of the apples, tucking it in around the edges. Bake for 20 minutes in the oven (the dough should turn a golden brown). Cool for 15 minutes. Carefully put a serving platter upside down on top of the pan and flip the platter and the pan over. Let the tart fall gently out of the pan.


Tuesday, January 12, 2010

Zucchinis and New Mommies - Parshat Shemot Part II

I had every intention of making the zucchini tart from last week's post by Thursday and letting you all know about it. But things got busy and we flew out to Chicago for our nephew's bris. Luckily, the ingredients sat waiting patiently for me in the fridge and this morning at 7 a.m. I whipped this tart up and plan to enjoy it tomorrow for lunch.


The funny thing is that I made a dairy version of the tart while away in Chicago for the weekend. We arrived a few days earlier than the bris with the promise to cook Shabbat meals for the new mommies and daddies. The Friday afternoon that had seemed clear for a slow shopping trip and ample cooking time disappeared as Uncle Sam got caught up with his nephew's train sets. Soon we had less than two hours to grocery shop for two meals (eight people each) in an unfamiliar store (not a quick process) and cook it all in an unfamiliar kitchen (also, not so quick). I had the zucchini tart on the menu, in addition to some fresh salads (with the world's best AND easiest dressing, the recipe for which I'll divulge below), ginger carrot squash soup (a recipe you'll have to wait for) and quinoa with crainsins and almonds.

In the interest of time I made a lot of shortcuts and compromises while buying the groceries - I bought baby carrots and pre-cut squash in the produce dept for the soup and frozen pie crusts in the freezer section for the tarts. When we got set up in the kitchen, Sam and I were racing around Iron Chef style. This is often what my Shabbat preparations look like at home, and I have dreamed about producing a cooking competition modeled after the pressures a working woman faces when preparing for a big Shabbat meal. With some more corner cutting, Sam's help and the help of 18 extra minutes, everything got completed. Sadly, I didn't have time to create the sliced zucchini lattice. However, I did discover that this recipe goes perfectly into frozen pie crusts and I would recommend it as a first choice for busy cooks who might be making this recipe (I have changed the recipe in the previous post to reflect this discovery). The dairy version of the tart (with cheese instead of tofu and milk instead of soy milk) was a real crowd-pleaser. One mommy who ended up with the leftovers even used it as nursing fuel the next day!

This morning's non-dairy batch smelled delish. I did make a few mistakes along the way - I bought puff pastry shells instead of a sheet last week, so I sort of formed the six shells into a circle on a baking sheet and baked away. I should have placed them in a baking dish, which would have helped retain more liquid. I had a challenge cutting the yellow squash into slices as pretty as the zucchini slices - the yellow squash seemed to have more disruptive seeds and a pear shape. I ended up only using some of the yellow strips and mostly green ones. But it all worked out in the end - the lattice came out nice and I used red onion in the filling which added a nice touch of color and a sharper fragrance.


Now, onto that promised dressing. If you have ever spent a Shabbat meal at our house you have probably tasted this salad dressing recipe and gushed to me how much you liked it and wondered what was in it. I always happily share it, and now here it is for your constant access. I make this pretty regularly during the week as well when I pack salads for lunch. My mom got the recipe from a friend from Riverdale named Etti, whose family is Sephardic, more than a decade ago. It was a staple in my mom's repertoire ever since and I am happy to have adopted it too. Two things - be sure to use freshly peeled garlic as well as a good garlic crusher (my favorite!), and use fresh lemon juice with an easy lemon squeezer (such as this one). Replacing these two ingredients with anything bottled or jarred will not result in the tantalizing dressing I make.

Look for this week's portion post in the next day or so!

My Go to Salad Dressing


1 garlic clove
1 lemon
2 teaspoons of olive oil
Dash of water
1 teaspoon or coarse salt

Cut the lemon in half and squeeze both halves with a handled squeezer into a cup. Crush the garlic clove with a good quality crusher (I love the one I linked to above because you don't have to peel the garlic and it's a cinch to clean) into the cup. Add oil, water and salt. Mix it up. Pour over the salad before serving and prepare to pucker and dig in for more.

Sunday, January 3, 2010

A Tisket A Tasket - Parshat Shemot

Well done, we made it to the book of Shemot (which literally means Names) aka Exodus. Well, maybe half congratulations since we covered 7 out of the 12 portions in the book of Breishit, aka Genesis (sorry for the late start). The book of Shemot is a great one - the next step in understanding the shaping of the Jewish nation. And this week's portion, Parshat Shemot (named for the book), contains one of the greatest moments of suspense in Jewish history. Only you might not have realized it.

You see, the book of Exodus starts out with this new Pharoh on the scene, one whom the text tells us doesn't know Joseph. So instead of seeing the Children of Israel as an asset to Egypt with a symbiotic history, this Pharoh sees the growing of the the Hebrew Nation as a threat to Egypt. Therefore Pharoh comes up with a plan to weaken the Nation by tasking them with the back breaking work of building pyramids. Only it seems that the harder he makes their work, the stronger and larger the Hebrew Nation grows. Back to the drawing board for Pharoh - next he conceives of a plan to kill off newborns. He enlists two midwives to kill every male born to a Hebrew woman. Fortunately for us, those brave midwives disobey. In plan B part 2 Pharoh gets the whole of Egypt on board - if you see a Jewish boy born, throw him into the Nile. That'll keep their numbers down, Pharoh figures.

Now here's where the moment of suspense is about to come in. During this time of national alert, Code Orange if you will, a Hebrew woman has been hiding her new born baby boy for 3 months, but knows she can't do it any longer without getting caught by an Egyptian neighbor. This brave mother, hoping for a better future for her child, weaves a basket out of reeds, covers it in pitch, nestles her baby in it and sends it down the Nile. She places her older daughter on watch duty from the banks to follow the basket and see what becomes of it.

As readers of the text we're all hoping for the baby to survive, but who should he first encounter? Eeh gads! Pharoh's daughter is taking a bath in the Nile and his basket is on a collision course with her!! We're biting our nails because we know that Pharoh is the one who decreed the killing of Jewish baby boys, and if his daughter finds this one she will surely obey. We're at the edge of our seat when she reaches her arm out and grabs the basket, our body tenses as she sees it's a baby boy and we practically cover our eyes when she announces "this is a baby of the Hebrews." Suddenly the baby's sister jumps out from her watch post and offers the daughter of Pharoh to find a Hebrew nurse to take care of the baby. Will Pharoh's daughter go for this we wonder? Or will she laugh her royal laugh and drown him right then and there?? Miraculously, in a moment of reprieve, she agrees to have the baby nursed till he is weaned, at which point she declares he will begin his life in the palace as Pharoh's daughter's own son. Phew.

That baby is of course Moses, and we may be so used to the text and the ironic ending, which lands Moses, the future leader of the Jewish people, a home in the palace of Pharoh, the oppressor of the Jewish people, that we can forget how suspenseful this moment in the portion is.

In homage to the brave women who saved and raised Moses (the midwives, his mom, his sister and the daughter of Pharoh) I share with you a recipe for a lattice tart constructed of woven squash slices which is reminiscent of the basket woven for baby Moses.

I first made this recipe on a Friday afternoon in college while preparing a Shabbat meal for my family. It was during my three month's as a vegan (a stint which was inspired by a wonderful restaurant in NYC's East Village, Caravan of Dreams, and was truncated when I got Mono on the Eve of Passover. FYI, if you are an Observant, Ashkenazy Vegan there is nothing to eat on Passover to cure Mono) and I was trying not to have my new diet choices impact my family's Shabbat meals. I saw the pictures of this recipe (I rarely cook a recipe that doesn't have a good picture to go with it) in my trusty Martha Stewart Cookbook, and was excited that it looked fancy enough to serve at a Shabbat table and that it could be incognito as a protein dish for meu. The idea of weaving the squash slices into a lattice pattern married my love of crafting and cooking. I was also excited that I had that Friday (and every Friday) off from Stern College, which would give me enough time to go slowly with the dish (in addition to cooking the rest of two Shabbat meals and cleaning the apartment). But I have simplified the recipe a bit, so you need not take the day off to prepare it.

I dedicate this post to my three day old nephew, who I am very grateful to say was born totally healthy in a hospital in Chicago, far away from any Pharohs. Mazal Tov to his Granny, Saba and Savta, Mom and Dad, big brother, and proud uncle. And, since this is a great vegetarian dish I want to also dedicate the post to my seven day old "niece," whose parents and big sister are gracious vegetarians - Mazal Tov to all of you as well. I can't wait to meet you two little ones in a few days. A double portion indeed!


Squash Lattice Tart

Adapted from Martha Stewart Living 2002 Annual Recipes Cook Book

This Recipe is quite amenable to change. I recently discovered that using a frozen pie crust is the easiest way to go, but if you want to shape your own dough (pizza or pastry, home made or store bought, no one is judging), it can really be made in any shape - the recipe suggests a rectangle but if you don't have a rectangle pie tart, go ahead and make it square, round, oval, you name it. The recipe can be made pareve (non-dairy) by using tofu and soy milk, or dairy by using cheese and milk or cream. So feel free to play with my variation of the recipe as well.

2 frozen pie crusts, pizza dough or puff pastry
Coarse salt
Pepper
2 zucchinis, washed and edges trimmed
2 yellow squash, washed and edges trimmed
2 tablespoons of olive oil
2 large onions diced OR 2 leeks, white part only, well washed and diced
1/2 cup of firm tofu or Cheese
1 egg
1 egg yolk
1/4 cup of high fat soy milk OR high fat milk or cream

Preheat the oven to 375.

If you are using frozen pie crusts skip down to after the image below.

The recipe calls for a 4/12 x 14 tart pan, but you can get creative with this. I suggest making this tart in a pan with a lip to make it feel more basket like and to absorb the liquid you will add, but feel free to play with the shape - what ever evokes the basket image most for you.

Place the dough on the tart pan and trim to fit. If using pizza dough, bake the crust alone for 5 minutes and then cool.


Cut the zucchini and squash in half lengthwise and trim the yellow squash to be more of a symmetrical cylinder. Using a mandolin slicer or some serious patience and skills plus a vegetable peeler, very thinly slice 1 zucchini and 1 yellow squash lengthwise.

Dice the other zucchini and squash. Saute them, along with the diced onions or leeks, in 2 tablespoons of olive oil over high heat. Season with salt and pepper. Cook for about 8 minutes until golden brown. Crumble the tofu or cheese over the veggies and then spread the mixture in the crust(s).

In a bowl, whisk the eggs and soy or regular milk and then pour over the tofu veggie mixture in the crust.

Here's for the basket weaving part:
1. Start at the narrower end of the tart, or one one side of a circular pie dish. Place the squash slices in alternating colors all the way down the length of the tart - you will probably have to use a few strips of squash in each line to make it all the way from one end of the tart to the other - that is fine.

2. Now go from the wider end of the tart to the opposite side, alternating colors, and also using multiple strips of the same color in each line to reach the opposite side. But this time, when going from the one side to the other, weave the slices into a lattice form by gently lifting the old slices to put the new ones over and under them in a pattern (keep repeating to yourself, over under, over, under). For some help with this general technique check out this video.

3. Continue the pattern until the whole pie is covered. Trim or tuck the ends of the squash slices to fit.

Bake the tart, loosely covered with tin foil for 35 minutes. Cool before serving.